[ad_1]
Easy topiary might seem like a contradiction in terms. Many of the great topiary gardens have lots of wonderful elaborate shapes that have taken years to grow.
We amateur gardeners don’t always feel we have the space, the expertise or the time to have a topiary garden.
But every time I visit our friends Diane and Robbie Perry, the first thing I notice is their dramatic topiary shapes. The effect is stunning – but the shapes themselves are mostly just simple balls and cones. (There is just one knot garden parterre in the front and a topiary spiral at the back).
Diane has one topiary knot garden in the front, with a box ball in the centre. However, she says this is more work than the balls and cones in the rest of the garden.
In winter their garden looks superb because of the drama created by the topiary. During the summer, the topiary adds punctuation to the froth and colour of summer flowers.
But you don’t need to be an expert…
Diane does all her topiary herself but is self-taught and calls herself strictly an amateur. She’s done some research (‘not as much as I should have done’, she adds). And she’s learned as she went along.
Diane took the architecture of their house as a starting point. They live in a converted Kentish oast house.

The distinctive cone-shaped chimney and circular kiln of Diane and Robbie’s Kentish oast house.
Kentish oast houses were originally used for drying hops, so they consisted of a rectangular building where hops were stored. This linked a number of circular rooms with conical roofs where the hops were dried by a wood charcoal fire below. Most of these traditional buildings are now homes, because modern technology and new barns have replaced the old ways.
Diane and Robbie’s house has circular rooms where the old kilns were with a rectangular space between them. The topiary cones and balls echo these circular rooms and conical roofs.
Repeat easy topiary shapes for a dramatic effect…
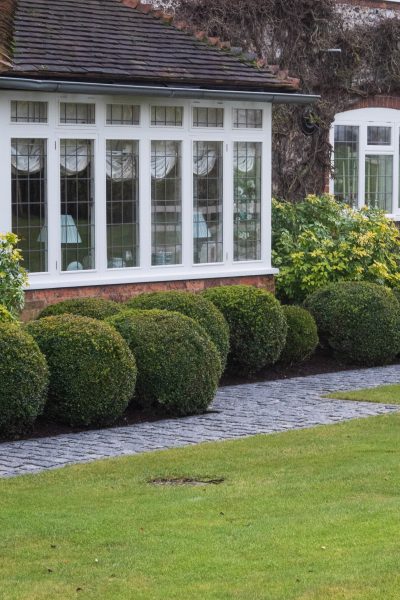
So how has Diane used these simple topiary shapes? Firstly Diane has used repetition to create a dramatic effect. The path in front of the house is edged with a row of box balls.

Box balls are one of the simplest and easiest topiary shapes. They look very effective in a row lining the path.
There are problems in parts of the UK with using box as it has been devastated by box blight and box caterpillar moth. Diane’s box is healthy and she looks after it carefully.
‘I have a pair of Niwaki topiary shears, which I only use for clipping topiary. And we never use anyone else’s tools. We also disinfect the tools, although once I left the shears soaking in the disinfectant for several hours and they rusted.’
She is also meticulous about sweeping away the clippings. They lay a sheet around the topiary to collect them, and even vacuum them up off the sheet. ‘It can look a bit odd when a neighbour pops round and they see me vacuuming my garden.’
And when Diane is clipping topiary balls into shape, she continues the shape of the ball at the bottom to allow more air through. She also adds a layer of blood, fish and bone or other nutrients to the soil to feed the box.
Alternatives to box…
Diane’s aware, however, that there’s also an element of luck in avoiding box disease or pests. If your area has been affected by box blight or box caterpillar moth, then you can get or trim similar ball and cone shapes in other plants.
These include yew, ilex crenata (a form of holly), some of the conifer Podocarpus variants, Osmanthus delavyi and some pittosporums. Honeysuckle can also be trained onto a shape and clipped, and the RHS also recommends a berberis variant called Compacta and some varieties of euonymus and eleagnus.
There are also some good natural conifer ball and cone shapes – see how conifers can transform your garden.
The RHS also recommend keeping new box plants in their pots somewhere isolated in your garden for three weeks to see if problems develop.
And the ‘rule of 3’ is a top design principle…
She’s also used the ‘rule of 3’ – a well known interior design principle that three similar or identical objects look exceptionally good together.

Line three ball or cone topiary shapes up, like these three box cones in front of Diane and Robbie’s window.
Use topiary balls and cones as punctuation points..
Robbie and Diane have also used pairs of balls and cones as sentinels on either side of an archway or path. The Kentish countryside can be windy so they’ve divided their garden into rooms, and they have used the simple topiary shapes to add structure and drama to the links between the areas.

Two box balls punctuate the entrance to another part of the garden.
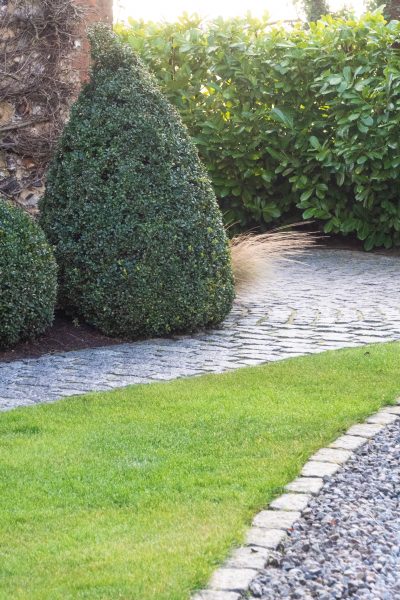
And they’ve used a single cone as punctuation points at the end of a path or to mark out a corner.

This box cone marks the end of a row of box balls and adds definition to the path.
And use balls and cones for contrast…
They’ve also used the simple sharp shapes of box cones and pyramids as a contrast to naturally shaggier plants and winter grasses – the leaf shape and colour contrast in this winter garden is really superb.

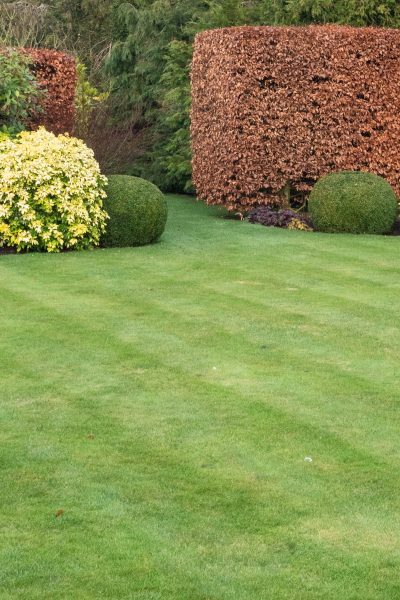
The tightly clipped topiary balls and cones contrast with shaggier shrubs and elegantly waving grasses. The difference in leaf colour also makes this a dramatic winter garden. In summer, the box offers a good contrast to an abundance of flowers.
How to clip simple topiary shapes..
You often buy topiary balls and cones ready made, and they’re not expensive when they’re small. Diane also bought many as small plants before topiarising them. She let them grow for a couple of years and then clipped them into shape. To get a bigger clump or to get size more quickly, she’s also planted several small plants close together.

Beautiful contrasts in Diane and Robbie’s garden.
She says she’s learned about trimming topiary by trial and error. They used to live abroad and only return to their home for holidays, so she initially trimmed the topiary in June. ‘Then there’d be a hot summer and the newly clipped foliage would turn bronze. So now I trim the topiary in August, and I check the weather forecast first.’
Note: The RHS advise trimming in ‘early or late summer’. May would probably have been better than June. But it may depend on what the weather is like where you live.
Diane sharpens the Niwaki blades before each session. She doesn’t let anyone else use these shears and she doesn’t use anyone else’s shears. If anyone else helps, they would use her tools. She also uses a sharp pair of Niwaki secateurs to sharpen up any loose ends.
Cut by eye or use a frame…
Diane cuts the shapes by eye. For the balls, she starts by cutting a cross into the top and then works round the sides in vertical quarters. ‘Be prepared to use your tools – yours shears and secateurs – in lots of different ways, turning them sideways or upside down,’ she says.
However you can also buy topiary frames which open up and you can clip them round the plant. This, of course, restricts your topiary to the size of the frame, but may be a good way of starting off. I’ve included a topiary frame in my topiary essentials list on the Middlesized Garden Amazon store.
(Note: links to Amazon are affiliate, so I may get a small fee if you buy, but I’ll only recommend things I use myself or can personally recommend.)
Topiary works well in pots and in difficult corners…
If you like the look of topiary, but think you won’t be able to keep them in good shape, Diane recommends that you start off with a few simple shapes in pots. ‘Keep potting them on or plant them out in the garden. We started off with topiary in pots. After around 10 years our earliest topiary had been in the pot too long. They were beginning to look scrappy, but there’s an area by the garden gate which I’ve used for re-planting topiary balls and cones.
This area doesn’t look like a dumping ground for failing box balls. It looks like a beautifully designed topiary corner.

This is where Diane re-plants topiary that has clearly outgrown its pot. The plants have revived and the collection looks great together.
‘I’ve found that these box balls and cones grow in almost any condition and are great filler for difficult areas,’ says Diane. ‘So just give them a go.’
Diane and Robbie have been growing the cones and balls in this garden for around ten years. The plants have all now reached a good size and Diane is ready to take on some more complex shapes. She is planning a pheasant and there is the beginnings of a rabbit beside the back gate.
Shop my my favourite gardening tools, books and products
I’ve put together some good topiary tools and a book on my topiary essentials list on the Middlesized Garden Amazon store.
(Note that links to Amazon are affiliate, so I may get a small fee if you buy, but I only recommend things I’ve used myself.) I’m often asked for recommendations so I’ve put together these lists of tools, books and products that I can recommend.
Pin to remember easy topiary
And do join us every Sunday morning on the Middlesized Garden blog – see ‘follow by email’ at the top of the page.

[ad_2]
Source link
